How 3D Christmas Paper Cut Art Transforms Holiday Decorating
There is something quietly mesmerizing about a layered paper scene that seems to breathe with depth. When you add the magic of Christmas into that equation, you get 3D Christmas Paper Cut art, a craft that has quietly moved from niche hobby to mainstream holiday tradition. Unlike flat prints or generic store-bought decorations, these multi-layered creations bring a tactile, almost theatrical quality to festive spaces. Whether you are a seasoned crafter or someone looking for a new way to make the season feel special, understanding what makes this art form tick can open up a world of creative possibilities.
What Exactly Is a 3D Christmas Paper Cut?
At its core, a 3D Christmas Paper Cut is a composition made from multiple sheets of paper, each cut with specific elements and then stacked or spaced apart to create a sense of dimension. Think of a winter village scene where the foreground trees, the midground houses, and the background snowy moon are each on separate layers. When placed in a shadow box or frame with spacers between them, the result is a stunning illusion of depth that changes subtly depending on the angle you view it from.
This technique is not entirely new. Paper cutting has roots in traditions like German scherenschnitte and Polish wycinanki. But the modern 3D Christmas Paper Cut takes those old-world methods and pairs them with contemporary design sensibilities, precision cutting tools, and digital templates. The effect is both nostalgic and fresh, making it a favorite for handmade gifts, personalized home decor, and even holiday marketing materials.
Why This Craft Appeals to Modern Makers
One of the most compelling reasons people gravitate toward 3D Christmas Paper Cut art is the balance it strikes between effort and reward. Unlike knitting a sweater or building a piece of furniture, a well-designed paper cut can be completed in an afternoon. Yet the finished piece looks intricate enough to have taken days. This makes it ideal for people who want to create something meaningful but have limited time during the busy holiday season.
Another draw is the versatility of materials. You are not locked into expensive specialty supplies. Cardstock, a sharp craft knife, a cutting mat, and a good template are really all you need to get started. For those who own a cutting machine like a Cricut or Silhouette, the process becomes even faster and more precise. The digital aspect of modern paper cutting means you can scale designs up or down, tweak colors, and even combine elements from multiple templates to create something entirely your own.
There is also a meditative quality to the work. Cutting paper requires focus, a steady hand, and a willingness to slow down. In a season that often feels rushed and consumer-driven, sitting down to carefully cut out the delicate branches of a paper Christmas tree can be a form of quiet resistance. Many crafters report that the act of cutting helps them feel more present and connected to the holiday spirit.
Key Qualities That Define Exceptional 3D Christmas Paper Cut Designs
Not all layered paper projects are created equal. If you are evaluating a template or designing your own, several characteristics separate a good result from a truly stunning one.
Layer Depth and Spacing
The illusion of three-dimensionality depends heavily on how layers are spaced. Using foam adhesive dots or strips of varying thickness creates physical distance between layers. A common approach is to use thicker spacers for the foreground and thinner ones for the background, which mimics natural perspective. If all layers are too close together, the scene looks flat. If they are too far apart, the alignment can become tricky and the piece may look disjointed. Getting this balance right is the single most important skill in creating a convincing 3D Christmas Paper Cut.
Color Harmony and Contrast
Christmas is a holiday of strong visual traditions, but that does not mean you have to stick to red and green. Many of the most striking paper cuts use a palette of deep blues, silver whites, gold accents, and even soft pastels. The key is contrast between layers. A light-colored foreground against a dark background makes the shapes pop. Conversely, a dark silhouette against a softly glowing back layer creates a moody, dramatic effect. When choosing paper, consider matte finishes for the main elements and a subtle shimmer for background layers to catch the light.
Intricacy Without Fragility
There is a fine line between detailed and fragile. A design with very thin connecting lines or tiny isolated pieces can be frustrating to cut and prone to tearing. The best templates are those that look intricate but are structurally sound. Look for designs where elements like tree trunks, window frames, or snowdrifts provide natural support. If you are designing your own, think about how each piece connects to the frame or the layer below it before you start cutting.
How 3D Christmas Paper Cut Fits into Modern Holiday Workflows
For many people, the holidays involve a mix of decorating, gift-giving, and entertaining. Paper cut art can serve multiple roles across all of these areas without demanding a huge investment of time or money.
As a decorating project: A single shadow box with a 3D Christmas Paper Cut scene can become a focal point on a mantel or entryway table. Unlike a string of lights that may burn out or a fragile ornament that can break, a paper cut stored flat between sheets of acid-free tissue paper will last for years. Many families make it a tradition to create a new scene each year, building a collection that reflects changing tastes and growing skills.
As a gift: Personalized paper cuts make exceptional presents. Imagine a scene that includes the recipient's house, their favorite winter animals, or a family of snowmen with names stitched into the scene. Because you control the design, you can tailor every detail. A framed paper cut also eliminates the awkwardness of giving something that might not fit or that requires assembly. It arrives complete, ready to hang.
As a party or workshop activity: Paper cutting is increasingly popular at holiday gatherings and community events. Set up a table with precut cardstock squares, a few simple templates, and basic tools. Guests can assemble their own small scenes in under an hour and leave with a handmade decoration. This works particularly well for adult gatherings where people want an engaging activity that still allows for conversation.
Practical Considerations Before You Begin
Before diving into your first project, there are a few factors worth thinking through. These are the things experienced paper cutters wish they had known from the start.
- Tool quality matters more than you think. A dull blade will tear paper fibers and frustrate you within minutes. Invest in a good craft knife with replaceable blades, and swap blades frequently. For intricate curves, a blade with a pointed tip is essential. For straight lines, a metal ruler and a rotary cutter can speed things up considerably.
- Paper weight is a balancing act. Standard printer paper is too flimsy for most layered designs. Cardstock around 65 to 80 lb (176 to 216 gsm) is ideal. It holds its shape well but is still easy to cut by hand. Heavier papers can be used for base layers, but they require more force to cut and may dull blades faster.
- Lighting changes everything. A 3D Christmas Paper Cut looks dramatically different under direct light versus diffused light. If you are framing your piece, consider adding a small LED strip inside the frame or positioning it so that a lamp casts light from the side. Side lighting emphasizes the shadows between layers and makes the depth far more visible.
- Patience with alignment is non-negotiable. Even a slight shift in layer placement can ruin the illusion of depth. Use alignment marks on your templates, and consider stacking layers temporarily with removable adhesive to check placement before committing with permanent glue.
Examples and Scenarios to Inspire Your Next Project
If you are not sure where to start, consider these popular approaches that showcase the range of what 3D Christmas Paper Cut can achieve.
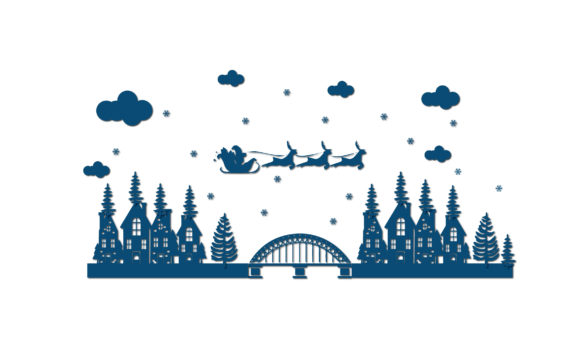
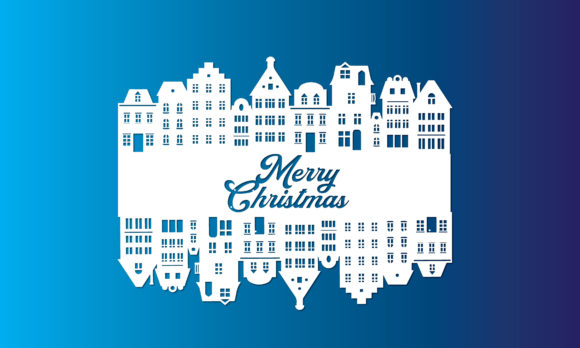
The classic winter village: This is the gateway project for most people. A row of houses with glowing windows, a church steeple, and a foreground of snow-covered pine trees. The layers are typically three to five deep. The background might be a night sky with a moon and stars cut from vellum to let light through. This style works beautifully in a deep shadow box frame.
The nativity scene: A more meaningful variation for those who celebrate the religious aspect of Christmas. The stable, the star, and the figures of Mary, Joseph, and the baby Jesus can each occupy their own layer. Using gold or silver paper for the star and halos adds a reverent glow. This makes a thoughtful gift for grandparents or godparents.
The modern minimalist tree: Not every paper cut needs to be dense with detail. A single Christmas tree built from several layers of simple geometric shapes can be striking in a contemporary home. Use white paper on a dark background with layers that increase in size from the top down. The negative space becomes as important as the cut shapes themselves.
The storytelling scene: Some paper cuts tell a story across layers. The foreground might show children sledding, the middle layer shows the hill they are on, and the background reveals a cozy house with smoke rising from the chimney. This approach works well when you want to capture a specific memory or create a narrative piece.
Recommendations for Getting the Most Out of Your Paper Cutting
If you are ready to move beyond basic templates, there are a few ways to elevate your work. First, experiment with mixed media. Adding a thin sheet of acetate behind cut-out windows gives the illusion of glass. A sprinkle of glitter on snowy rooftops catches the light. A backing of metallic paper can make the entire scene feel more luxurious.
Second, consider the frame itself. A simple black or white shadow box is the standard, but a frame with a deep profile in a warm wood tone or a vintage gold finish can completely change the character of the piece. The frame is part of the art, not just a container for it.
Third, share your work. The online community for paper cutting is vibrant and generous. Platforms like Instagram, Pinterest, and dedicated crafting forums are full of free templates, technique tutorials, and encouragement. Posting your finished piece often leads to requests from friends and family, which can turn a hobby into a small holiday business if that interests you.
Common Questions People Have Before Starting
Many newcomers wonder whether they have the manual dexterity to cut intricate shapes. The honest answer is that most people improve quickly with practice. Starting with larger, simpler designs builds confidence. Fine detail work can be added as your hand becomes steadier. Left-handed cutters should look for ambidextrous tools and templates that do not favor a dominant hand.
Another common concern is the mess. Paper cutting generates tiny scraps and dust. Using a self-healing cutting mat with a grid helps keep things organized, and a small handheld vacuum or a lint roller makes cleanup fast. Working over a tray or a large sheet of paper catches most of the debris.
Finally, people often ask about durability. A well-glued paper cut in a sealed frame can last decades. Avoid exposing it to direct sunlight, which can fade papers, and keep it away from humid areas like bathrooms or kitchens. With minimal care, a 3D Christmas Paper Cut becomes a lasting heirloom rather than a disposable decoration.
There is a particular kind of satisfaction that comes from holding a finished paper cut. The light falls through the layers, the shadows stretch and shift, and something that was once just flat sheets of paper becomes a small world. That transformation, simple and profound, is why this craft continues to capture imaginations every December.