Why Your 3D Santa Claus SVG Bundle Might Not Work as Expected
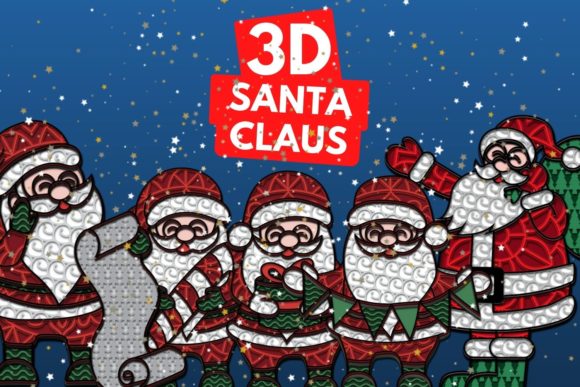
You found the perfect 3D Santa Claus SVG Bundle online. The preview images look stunning. Layers of dimensional detailing, rich reds and whites, a jolly expression that practically leaps off the screen. You download it, open it in your design software, and… something is off. The layers don't align. The 3D effect looks flat. The file doesn't cut properly on your machine. What went wrong?
The truth is, working with 3D SVG bundles requires more than just clicking download. Whether you are a seasoned crafter, a print-on-demand seller, or a hobbyist designing holiday décor, understanding what you are actually getting and how to use it properly makes the difference between a project that wows and one that wastes material. Let's walk through the most common pitfalls and how to avoid them.
Assuming All 3D SVG Files Are Ready to Cut
A frequent misunderstanding is that every file in a 3D Santa Claus SVG Bundle comes pre-optimized for cutting machines like Cricut or Silhouette. Many bundles include layered SVG files designed for digital rendering, not physical cutting. The difference matters. A file intended for digital display may have overlapping paths, open contours, or excessive node density that causes your machine to skip lines or cut in the wrong order.
Before you load that file, open it in your design software and check each layer. Look for stray anchor points, overlapping elements, and unconnected lines. If you see paths that cross without intersecting cleanly, the cut will likely fail. A simple fix is to use the weld or union function to merge overlapping shapes. This ensures your machine reads one continuous path rather than dozens of conflicting segments.
Another practical step is to test the file on cardstock before using premium materials. A five-minute test cut saves you from wasting expensive holographic vinyl or glitter paper. If the test cut fails, adjust the layer order or simplify the design. Most quality bundles include a help file or layer guide, but not all do. When in doubt, reach out to the seller and ask about cut-ready status before purchasing.
Overlooking Layer Management and Assembly Order
A 3D Santa design relies on stacked layers to create depth. The beard sits above the coat. The hat overlaps the head. The nose projects forward. If you import the files and start assembling without understanding which layer goes where, you end up with a flat, confusing mess.
One common mistake is assuming the layers are named intuitively. Some bundles use generic labels like Layer 1, Layer 2, and Layer 3, leaving you to guess the assembly order. This leads to frustration, wasted adhesive, and a final piece that lacks the intended dimensional effect.
The better approach is to rename your layers immediately after importing. Use descriptive terms such as Hat_Back, Hat_Front, Face_Base, Nose_Top. This small habit transforms your workflow. You will see exactly where each piece fits, and you can group related elements before cutting. If your software supports layer color coding, use it. Assign red to base layers, blue to mid layers, and yellow to top details. Visual cues speed up assembly and reduce errors.
For complex bundles with ten or more layers, consider printing a reference sheet. Take a screenshot of the finished design and label each numbered piece. Tape this sheet to your workspace. It costs nothing but saves minutes of guesswork per project.
Misjudging Scale and Proportions
The preview images in a 3D Santa Claus SVG Bundle often show the design at an idealized size. You might assume the file will scale up or down without issue. SVG files are vector-based, so they scale mathematically, but practical limits exist. A Santa design intended for a 12-inch decoration will lose detail if shrunk to 3 inches for a gift tag. Thin lines become invisible. Small cutouts turn into solid blobs. The 3D effect collapses because the layers no longer have enough surface area to create visible depth.
Before you commit to a size, check the actual dimensions of the smallest detail in the file. Use your software's measurement tool to find the thinnest line or smallest cutout. A good rule of thumb is that no detail should be smaller than 1/16 inch for paper crafting or 1/8 inch for vinyl. If the detail is smaller, either enlarge the overall design or simplify the affected layer by removing delicate elements.
Another overlooked factor is material thickness. A 3D effect works best when each layer is separated by a visible gap. If you use thin cardstock, the layers stack tightly and the depth is minimal. For a pronounced 3D look, use foam mounting tape between layers or choose chipboard for the base layers. The same SVG file can produce a completely different result depending on the material thickness you pair with it.
Ignoring File Format Limitations
Not all SVG files are created equal. A bundle marketed as a 3D Santa Claus SVG Bundle may include SVG, DXF, PNG, EPS, and PDF variants. Each format serves a different purpose. Using the wrong one leads to import errors, missing layers, or distorted geometry.
The SVG format itself has variations. Some bundles use SVG 1.1, which most modern software supports. Others use SVG Tiny, a stripped-down version that omits gradients, filters, and embedded images. If your bundle includes only SVG Tiny files, you may lose the shading and highlight layers that give the design its 3D appearance.
DXF files are common for laser cutting, but they often lack layer metadata. You import a DXF file and find all elements on a single layer. Separating them manually takes time and defeats the purpose of buying a bundled set. EPS files are reliable for print applications but can overshoot cutting machine compatibility.
The practical fix is to always open the SVG version first. If the file looks correct, export a copy in the format your machine prefers. Do not convert formats back and forth. Each conversion risks data loss, especially with complex layered designs. Keep the original SVG as your master file and only convert when necessary.
Neglecting the Licensing Terms
This point is easy to skip, but it matters more than most people realize. Many 3D Santa Claus SVG Bundle purchases come with a license that restricts commercial use. You may be allowed to use the designs for personal projects, holiday gifts, or classroom activities. But selling finished products, uploading to print-on-demand sites, or distributing the digital files themselves often requires a commercial license or extended license.
Assuming you can sell items made from a bundle without checking the license is risky. Sellers have been issued takedown notices, had their accounts suspended, or faced legal demands for using assets without proper rights. The penalty far outweighs the few dollars saved by skipping the license check.
Read the license before you download. Look for explicit language about commercial use, production limits, and attribution requirements. Some bundles allow unlimited commercial use. Others cap it at 100 sales or require a separate fee. If the terms are unclear, contact the seller directly. A reputable creator will answer promptly and clarify the conditions. Keep a copy of the license in your project folder. If you ever need to prove your rights, you have the documentation ready.
Skipping Software Compatibility Checks
You purchased a 3D Santa Claus SVG Bundle designed in Adobe Illustrator. You use Inkscape or Affinity Designer or Silhouette Studio. The file opens, but colors are wrong, layers are merged, or effects are missing. This happens because SVG files can embed features specific to the creating software. Illustrator uses live paint groups, gradients, and patterns that free software renders differently.
Before buying, check the bundle description for software compatibility. Many creators list tested software. If they do not, ask in the reviews or contact the shop. A simple question like, "Has this been tested in Inkscape?" takes seconds but prevents an entire project from stalling.
If you already have the file and face compatibility issues, try opening it in a browser or a dedicated SVG viewer first. This shows you the intended appearance. Then import into your software and manually rebuild missing gradients or adjust layer order. It is not ideal, but it works as a stopgap. For frequent use, consider standardizing on one design suite that handles layered 3D SVGs reliably. Consistency reduces guesswork.
Underestimating the Time Investment for Assembly
The final and most practical mistake is assuming a 3D Santa Claus SVG Bundle produces a finished product in minutes. Cutting the pieces is the fast part. Assembly takes significantly longer, especially for intricate designs with many layers. A twelve-layer Santa with tiny elements like buttons, eyes, and holly leaves might require thirty minutes of careful stacking, gluing, and pressing.
Rushing through assembly leads to misaligned layers, glue smudges, and a lopsided final piece. Take the time to organize your cut pieces by layer before applying any adhesive. Use a weeding tool or tweezers for small elements. Work from the largest base layer upward, letting each layer dry fully before adding the next. If the design uses foam tape, cut small squares rather than strips to avoid excess bulk.
Set realistic expectations for yourself and your customers if you sell the finished items. A hand-assembled 3D Santa ornament commands a higher price because of the labor involved. Price your work accordingly, and do not undervalue the time you invest.
Building Better Habits with Every Bundle
Every 3D Santa Claus SVG Bundle you buy teaches you something. Maybe you discover that you prefer designs with fewer layers. Maybe you learn to always check the license first. Maybe you develop a system for testing cut settings before the final run. The goal is not to avoid every mistake, but to catch the ones that waste time, material, and money.
Start with a small bundle. Test one design thoroughly. Note what works and what does not. Then apply that knowledge to your next project. Over time, you will develop a workflow that feels natural, efficient, and reliable. The 3D effect will pop exactly as intended, and the jolly Santa you create will look as impressive in real life as it did on the screen.