Mastering the Lacrosse 3D Layered SVG Cut File: A Practical Guide
A lacrosse 3D layered SVG cut file can transform a simple craft project into a striking, dimensional piece that captures the sport’s energy. Whether you are designing team gifts, custom apparel, or wall art for a lacrosse enthusiast, the layered approach adds depth and visual interest that a flat design simply cannot match. Yet many creators—from hobbyists to small business owners—struggle to get the results they want. The file itself is only the starting point; how you use it, prepare it, and assemble it determines the final outcome. This guide walks through the most common pitfalls and shows you how to avoid them, so your project looks polished and professional every time.
What Makes a Lacrosse 3D Layered SVG Cut File Different?
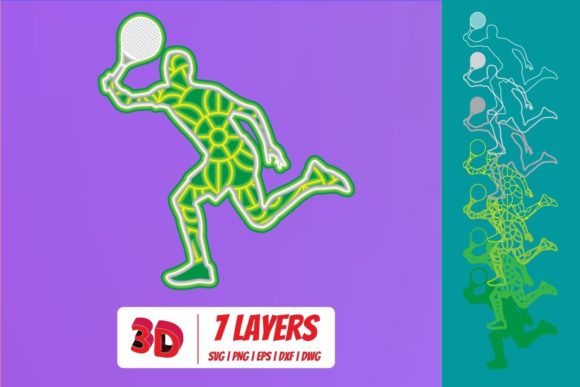
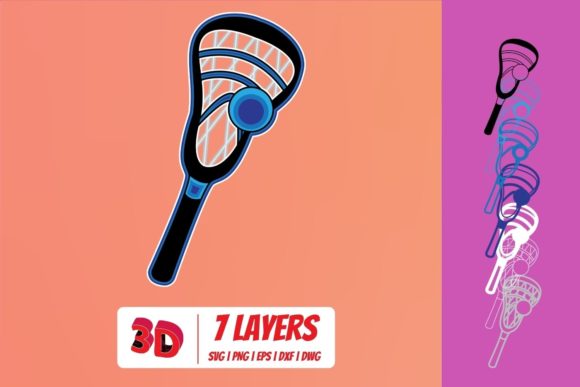
Unlike a standard single-layer SVG, a 3D layered design consists of multiple stacked pieces. Each layer is cut separately from materials like cardstock, vinyl, or chipboard, then assembled to create a raised effect. For a lacrosse theme, typical layers might include a background silhouette, the player silhouette, a lacrosse stick, a ball, and perhaps text or a mascot accent. When properly aligned and layered, these pieces create a sense of motion and depth. That depth is what sells the design—but it also introduces complexity. A small misalignment or a poor choice of material can ruin the illusion.
1. Overlooking Layer Separation Requirements
One of the most frequent mistakes is downloading a lacrosse 3D layered SVG cut file and assuming all layers are already perfectly separated. Many files come with layers grouped together or even overlapping in ways that are not obvious at first glance. Beginners sometimes try to cut the entire file as one piece, which defeats the purpose of the layered effect. Worse, it can damage your cutting machine or waste material.
What to check: Open the file in your design software (such as Adobe Illustrator, Inkscape, or Cricut Design Space) and inspect each layer individually. Look at the layer panel. Each distinct level should be on its own layer or named clearly (e.g., “Base,” “Layer 2,” “Layer 3”). If you see any shapes that span multiple heights, you may need to separate them manually using slice or contour tools.
Better approach: Before cutting, preview each layer in an isolated view. Many designers provide a color-coded proof image that shows how the layers stack. Use that as a reference. If the file does not come with such a guide, create your own by arranging the layers in your software and taking a screenshot. This prevents confusion during assembly.
2. Choosing the Wrong Material for Each Layer
Not all materials behave the same way in a 3D layered construction. A lacrosse 3D layered SVG cut file often looks best when the base layer is sturdy, the middle layers provide contrast, and the top layer is crisp. But many crafters grab any cardstock they have on hand, leading to flimsy results that warp or lack dimension.
Practical advice: For the base layer, use a heavier cardstock (at least 110 lb or 300 gsm) or a thin chipboard. This provides stability. For upper layers, you can use lighter weight (65–80 lb) to keep the silhouette clean. If you plan to frame the finished piece, consider using foam mounting tape between layers instead of stacking only paper—this adds depth without requiring more cuts. For vinyl projects, choose a premium adhesive vinyl with a matte finish to reduce glare. Avoid glossy vinyl for the top layer unless you are going for a specific shiny effect, as it can make the design look cheap under direct light.
3. Ignoring Cutting Order and Direction
When cutting multiple layers of a lacrosse 3D layered SVG cut file, the order in which you cut matters. Some materials, especially textured or glitter cardstock, wear down the blade faster. Cutting the most intricate layer first can lead to tearing or misalignment if the blade dulls halfway through.
How to fix this: Always cut the largest, least detailed layer first. In a lacrosse player design, that might be the background silhouette or the field outline. Save the fine detail layers—like the lacrosse stick strings or the ball—for after you have confirmed the material is feeding well and the blade is sharp. Change your blade regularly; a dull blade can lift material or leave rough edges, which ruin the clean look of a layered piece.
4. Misjudging Material Orientation and Adhesion
Another overlooked detail: many cut files include a mirrored or reversed image for certain layers because they are designed to be attached as a sticker or decal. If you cut all layers with the material face-up, you may end up with a design that appears backwards when assembled. This is particularly relevant for text or logos within the lacrosse 3D layered SVG cut file.
Quick tip: Check whether the design includes any text or directional elements. For layers that will be applied as a front-facing decal, the image should be mirrored before cutting if you plan to use transfer tape. For layered cardstock pieces that are glued directly, no mirroring is needed. A simple test: cut one small layer and hold it up to a mirror or take a photo to compare with the intended look.
5. Skipping the Test Cut
Even experienced creators sometimes skip the test cut when working with a new lacrosse 3D layered SVG cut file. This is a costly mistake. The lacrosse design may have thin lines, tight curves, or small gaps that your specific machine and material combination handle differently. A test cut on a small corner or a scrap piece takes two minutes and can save you an entire sheet of expensive material.
What to do: After you have prepared the file, resize a small portion (like the ball or a single player silhouette) and run a test cut on the same material you plan to use. Check for weeding ease, cut depth, and whether the design lifts cleanly. Adjust pressure, speed, or blade offset as needed before cutting the full layers.
What to Check Before Buying a Lacrosse 3D Layered SVG Cut File
Not all files are created equal. Many sellers offer beautiful preview images, but the actual SVG may suffer from poor geometry, missing layers, or confusing instructions. Before you purchase or download, verify these points:
- Layer count and naming: A good file clearly labels layers (e.g., “Base Layer - Blue,” “Mid Layer - White,” “Top Layer - Red”). Avoid files that list only “Layer 1, Layer 2” without guidance on order or color.
- Release on commercial use: If you plan to sell items made from the file, ensure the license permits commercial use. Some files are for personal projects only.
- Included formats: A robust lacrosse 3D layered SVG cut file should come in SVG, DXF, and possibly PNG with transparent background. This ensures compatibility across Cricut, Silhouette, and other cutting software.
- Assembly guide or photo: The best sellers include a step-by-step assembly photo or video. Without one, you may struggle to understand which layer goes where, especially if the design has many small accents.
- Scalability: Check that the file is vector-based and can be resized without losing quality. Raster images inside an SVG can cause pixelation when scaled up.
Practical Assembly Tips for a Polished Finish
Once you have chosen a solid lacrosse 3D layered SVG cut file and prepared your materials, assembly is where the magic happens. Here are a few techniques that separate a professional result from a messy one:
- Use a stacking guide: Print out the color-coded layer order from your software and keep it beside you. As you glue each layer, mark it off. This prevents accidentally swapping layers that look similar.
- Apply adhesive sparingly: A glue stick or liquid glue applied in a thin layer avoids bubbling. For larger layers, use double-sided tape on the back of the outer edges only—this leaves the center free for adding foam tape if desired.
- Add a finishing border: For a shadow box or framed display, consider adding a thin border around the base layer. This frames the design and hides any slight misalignment at the edges.
- Press evenly: Place the assembled piece under a heavy book or use a brayer to press layers flat. Wait at least an hour before framing or packaging to ensure full adhesion.
Advanced Considerations for Entrepreneurs and Educators
If you are creating lacrosse 3D layered SVG cut files to sell as a small business, or using them in a classroom or team fundraising event, efficiency and consistency become critical. Design your own files or modify existing ones to add unique elements like team names, numbers, or custom color palettes. Batch cutting by material type (e.g., cut all base layers from red cardstock at once, then all mid layers from white) saves time. For classroom use, pick files with fewer layers—three layers are usually enough for a strong effect without overwhelming younger crafters. And always keep backup copies of the original file in a cloud folder, so you can re-cut a layer if a mistake happens.
One final point: remember that a lacrosse 3D layered SVG cut file is only as good as the preparation behind it. Take the time to understand the structure of the file, choose the right materials, test your setup, and assemble with care. The result will be a dimensional piece that stands out—whether it is displayed in a home, given as a gift, or sold at a market. By avoiding these common traps, you ensure your project honors the sport and the effort you invested.